Getting started with Firefox OS
Book of FoxChapter2 ▼
Your first app
Let's get started by creating a simple "hello world"-style application. It will be a blank page showing the battery status, in other words how much battery you have left. The status will also update as you drain or charge the battery.
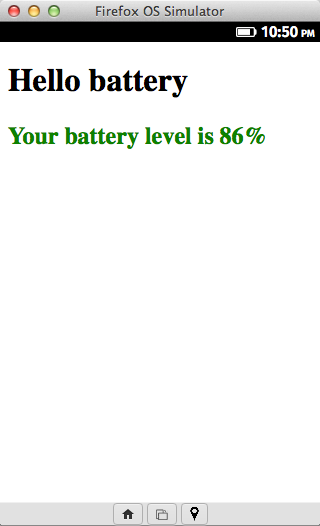
Here's a screenshot of the finished product:
The battery status API is a good example of something that traditionally didn't exist in web programming for desktop clients, simply because that desktop computers didn't really have a battery, they were always plugged into the grid. Mozilla folks thought a battery API is important for modern day web programmers and for the web platform. W3C agreed and now there is a standard API, which is available in Firefox (including desktop versions) in the form of the navigator.battery object (try it in your Firefox/Firebug console).
Prerequisites
Since Firefox OS is a web platform, there aren't any compilers or SDK prerequisites to install. You use HTML, CSS, images and JavaScript just the same as always. You use your favorite text editor.
You only need something to run the application. To save time, let's not discuss the details of what this "something" is. The easiest way to see your application running is to use the R2D2G2B extension for Firefox.
It's available at https://addons.mozilla.org/en-US/firefox/addon/firefox-os-simulator/
The installation is as effortless as installing any other browser extension.
Once you're done, go to menu Tools / Web Developer / Firefox OS Simulator. You'll see a picture like this:
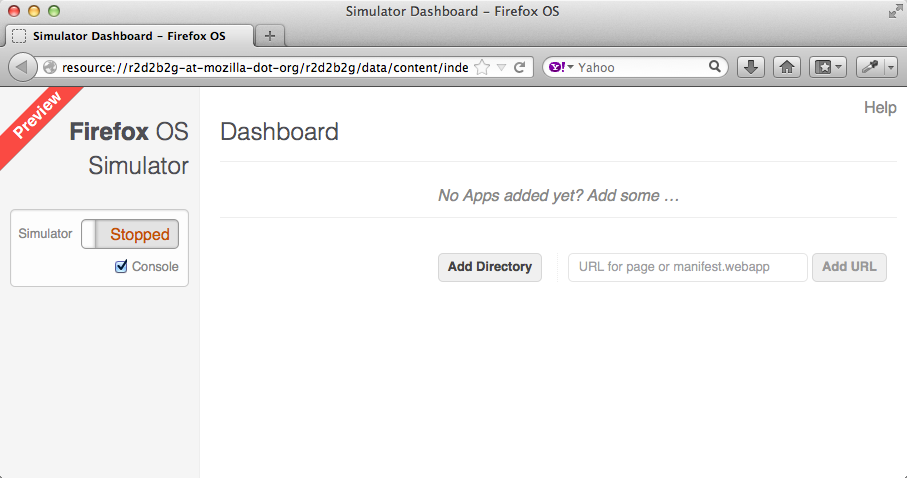
Click the toggle button that says Stopped and you get to experience the Firefox OS, waiting for your app.
Directory structure
Your first app is going to be simple, just to get started, but you can still create a proper project structure in case you want to expand the application later on.
First, create a folder for the application, let's call it ffapp (Firefox App) and put in Codez directory under the home directory:
mkdir -p ~/Codez/ffapp
cd ~/Codez/ffapp
In this folder let's follow the patterns established by the built-in Firefox OS apps and have a js and style directories.
mkdir js
mkdir css
touch js/ffapp.js
touch style/ffapp.css
Now the behaviors (JavaScript) and styles (CSS) are taken care of. Next you need an HTML file:
touch index.html
And finally, a manifest file that describes the application for packaging and installation purposes:
touch manifest.webapp
For the time being, just consider the manifest a necessary evil and try to get by with the minimal amount of configuration in it.
Sources
You only need a few lines of code to get off the ground.
HTML
In the markup, you:
-
Include the CSS and JavaScript dependencies
-
Say "Hello"
-
Create an element with an
idso it's easy to get a handle to it and update its content -
The rest is bare bone minimal HTML document with a simple doctype and charset
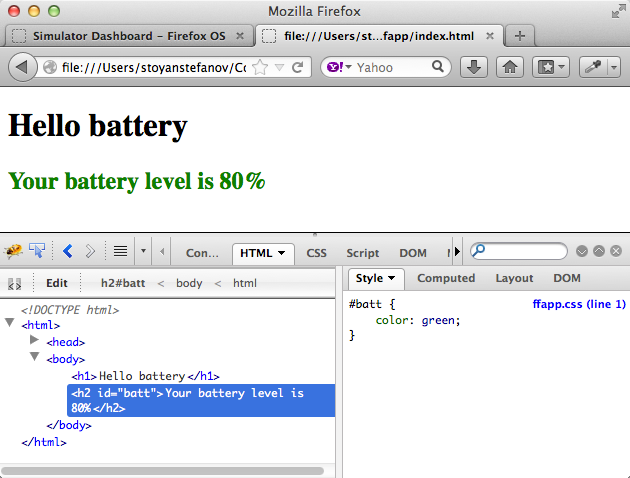
<!DOCTYPE html>
<html>
<head>
  <meta charset="utf-8">
  <script src="js/ffapp.js" defer></script>
  <link href="style/ffapp.css" type="text/css" rel="stylesheet" />
</head>
<body>
  <h1>Hello battery</h1>
  <h2 id="batt"></h2>
</body>
</html>
CSS
Just to make sure you use CSS, let's do something simple, like paint the battery status message green:
#batt {
  color: green;
}
JavaScript
JavaScript is the brains of the application, all the logic and behavior is there.
Starting off with a shorter reference to the battery object, to save typing:
var batt = navigator.battery;
Now batt.level gives you the level of the battery as a number between 0 and 1. However people are accustomed to seeing percentages, so let's multiply this number by 100.
var text = 'Your battery level is ' + Math.round(batt.level * 100) + '%';
Presenting this text to the user simply means updating the HTML element with the id "batt", just like a regular web page:
document.getElementById('batt').textContent = text;
Now, to make this code reusable, let's put all this "business logic" in a function called update() and call it when the application (the page) loads.
function update() {
  var text = 'Your battery level is ' + Math.round(batt.level * 100) + '%';
  document.getElementById('batt').textContent = text;
}

update();
Lastly, let's make sure the battery status is always accurate and up to date. To do this you subscribe to the levelchange event that the battery object fires. Any time this event fires you replace the text content of the batt element with the latest value:
batt.addEventListener('levelchange', function () {
  update();
});
To put all this together, the whole .js files is as follows:
var batt = navigator.battery;

function update() {
  var text = 'Your battery level is ' + Math.round(batt.level * 100) + '%';
  document.getElementById('batt').textContent = text;
}

update();

batt.addEventListener('levelchange', function () {
  update();
});
Mid-flight testing
At this point, you can open your app and test in any desktop browser, preferably Firefox as it supports the battery API. Opening the app simply means loading the index.html file with a local path, with a file:/// protocol. In fact you can test in the browser at any time after you created index.html.
For the sake of source code completeness, let's take a look at the manifest file, which is the last piece you need to take care of before you have a finished application.
Manifest
The manifest is a file with a .webapp extension that contains JSON encoded data. Let's keep it as simple as possible with only the absolutely required fields.
{
  "name": "Battery",
  "launch_path": "/index.html",
  "icons": {
    "128": "/images/logo128.png"
  }
}
As you see, the manifest requires you to define a name and a starting point (the index.html) for the app and this is the absolute minimum. The 128x128px icon is technically not required for now, but the simulator will give you a warning that you cannot submit to the app store without it. For the time being you don't need to have an actual logo128.png file. If it's not found, the default icon will be used.
Testing in the simulator
At this point the app is done and you can test it in the simulator.
-
Open the simulator (Tools / Web Developer / Firefox OS Simulator)
-
Make sure the "Console" checkbox on the left hand side is checked
-
Click the "Add Directory" button (although you're actually looking for a file)
-
Find and select your
manifest.webappfile (e.g. in~/Codez/ffapp)
Your app installs and the simulator launches with the app running. Congratulations! You've created your first mobile web application for Firefox OS!

Your turn
Now it's time to play around with the example and add a few features just to get comfortable with the development:
-
Paint the status red if the battery level becomes dangerously low, say under 20%
-
Create a real icon and make sure the path to it is correct in the manifest
-
Show the plugged in/out status too, in other words whether or not the battery is charging.
-
Show how much time the user has left before the battery dies
|
Note
|
The easiest way to explore the battery API is to open desktop Firefox's console (or Firebug) and type: |